Milanesa is a beloved dish that combines simple ingredients with a precise preparation process to create a crispy, flavorful delight. Whether you’re a seasoned chef or a home cook looking to expand your culinary repertoire, mastering the ingredients and preparation of Milanesa is a rewarding endeavor.
In this comprehensive guide, we’ll explore the essential ingredients, detailed preparation steps, common pitfalls, and expert tips for achieving the perfect Milanesa crust.
Essential Ingredients for Milanesa
Creating a delicious Milanesa starts with choosing the right ingredients. The quality and freshness of your components play a crucial role in the final dish.
Types of Meat
The foundation of Milanesa is the meat, traditionally beef, but variations include chicken, pork, and veal. Here’s a closer look at each:
- Beef: The classic choice, typically using cuts like top round or sirloin. Beef provides a rich, robust flavor that stands up well to the breading and frying process. For an authentic Argentine experience, consider using a cut called “nalga” or “peceto,” known for their tenderness.
- Chicken: Offers a lighter taste and is often preferred for a lower fat option. Boneless, skinless chicken breasts are ideal. Ensure to pound them evenly to achieve a uniform thickness for even cooking.
- Pork: Delivers a slightly sweeter flavor, with pork loin being a popular choice. Pork Milanesa, known as “Milanesa de Cerdo,” is particularly popular in Mexican cuisine.
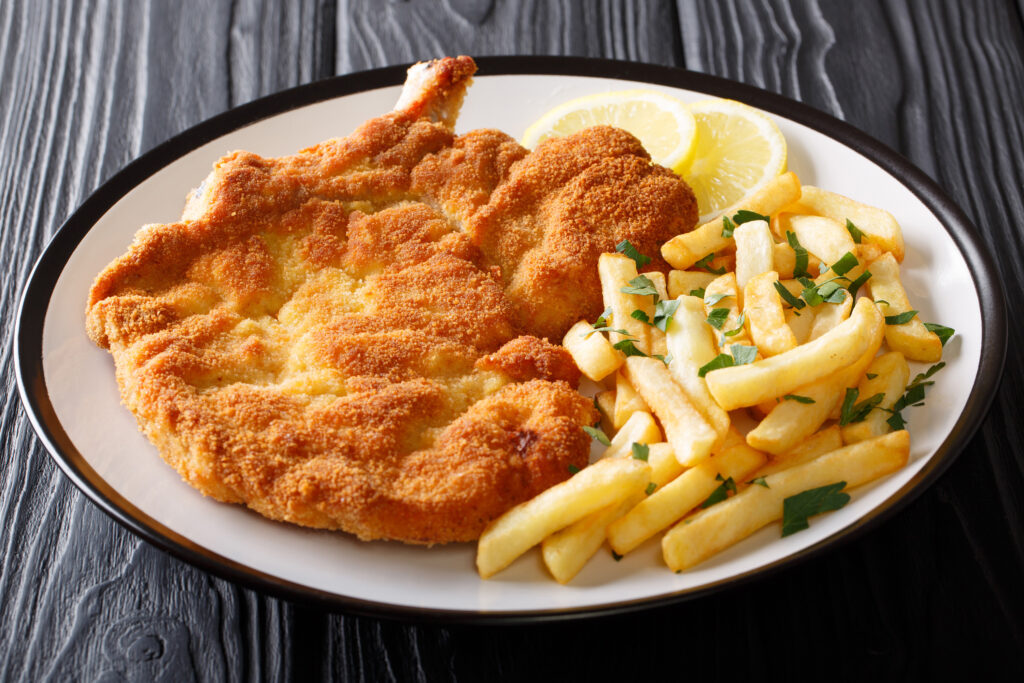
- Veal: Known for its tenderness, veal cutlets make for an exquisite and delicate Milanesa. Veal Milanesa, or “Cotoletta alla Milanese,” is a classic Italian variation often served with a squeeze of lemon.

Bread Crumbs and Coatings
The breading is what gives Milanesa its signature crispy texture. Here’s what you need to know:
- Bread Crumbs: Traditional bread crumbs are most commonly used, but panko crumbs offer a crunchier texture. For an added twist, some cooks mix in grated Parmesan cheese or finely chopped herbs.
- Seasonings: Adding salt, pepper, garlic powder, and herbs like parsley to the crumbs enhances the flavor. A bit of paprika or cayenne pepper can add a subtle kick.
- Egg Wash: Eggs mixed with a bit of milk or water help the crumbs adhere to the meat. For a richer coating, some recipes recommend adding a touch of Dijon mustard to the egg wash.
- Flour: A light dusting of flour before the egg wash ensures the coating sticks properly. Seasoning the flour with salt and pepper adds an additional layer of flavor.
Step-by-Step Preparation Process
Perfecting Milanesa requires attention to detail in each step of the preparation process. Let’s break it down:
Marinating the Meat
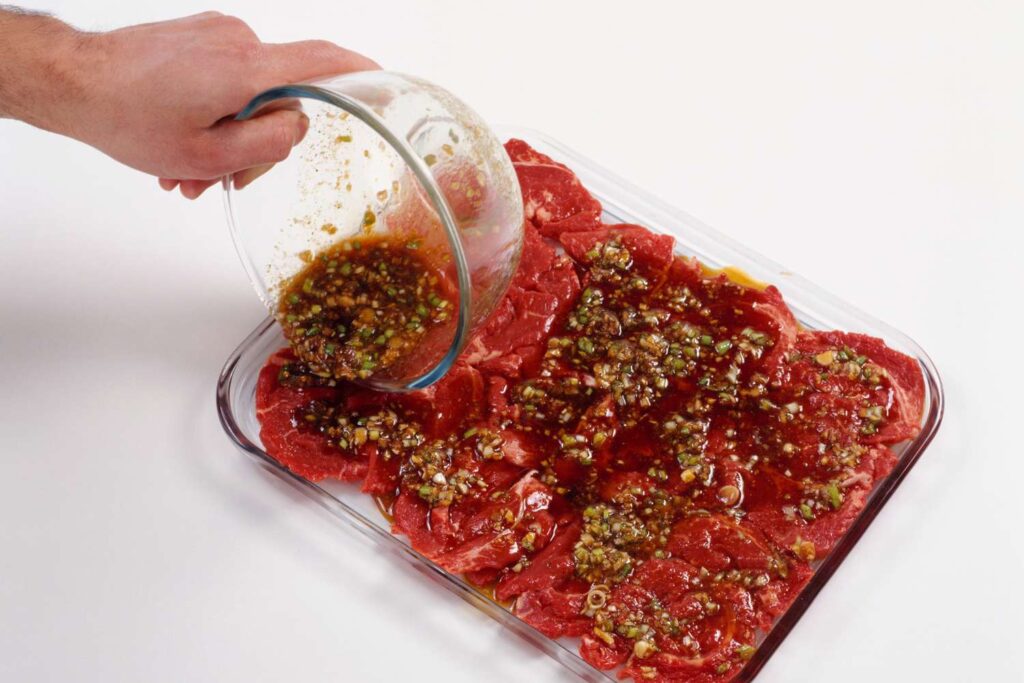
Marinating is an optional step but highly recommended for added flavor and tenderness.
- Selection: Choose your meat and ensure it’s thinly sliced. If necessary, pound it to about 1/4 inch thickness. Uniform thickness ensures even cooking.
- Marinade Ingredients: Common marinades include a mixture of olive oil, lemon juice, garlic, salt, pepper, and herbs like oregano or thyme. Some variations use white wine or vinegar for added acidity.
- Marination Time: Allow the meat to marinate for at least 30 minutes, or up to a few hours for deeper flavor absorption. Marinating overnight can infuse the meat with even more flavor, especially for tougher cuts like beef.
Breading Techniques
The breading process is where the magic happens. Follow these steps for a perfectly coated Milanesa:
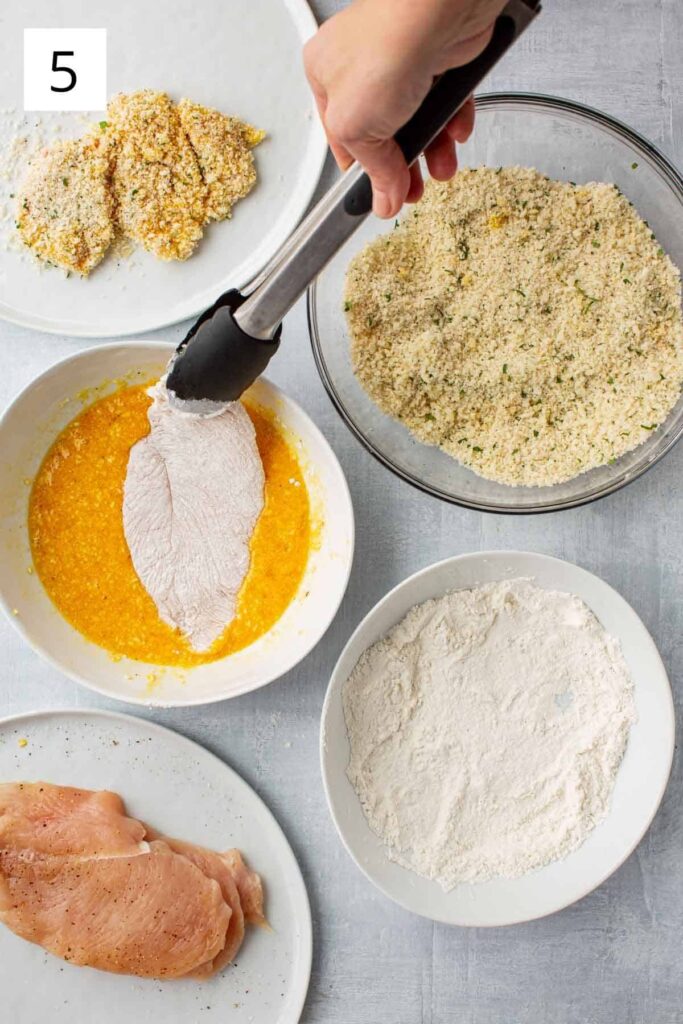
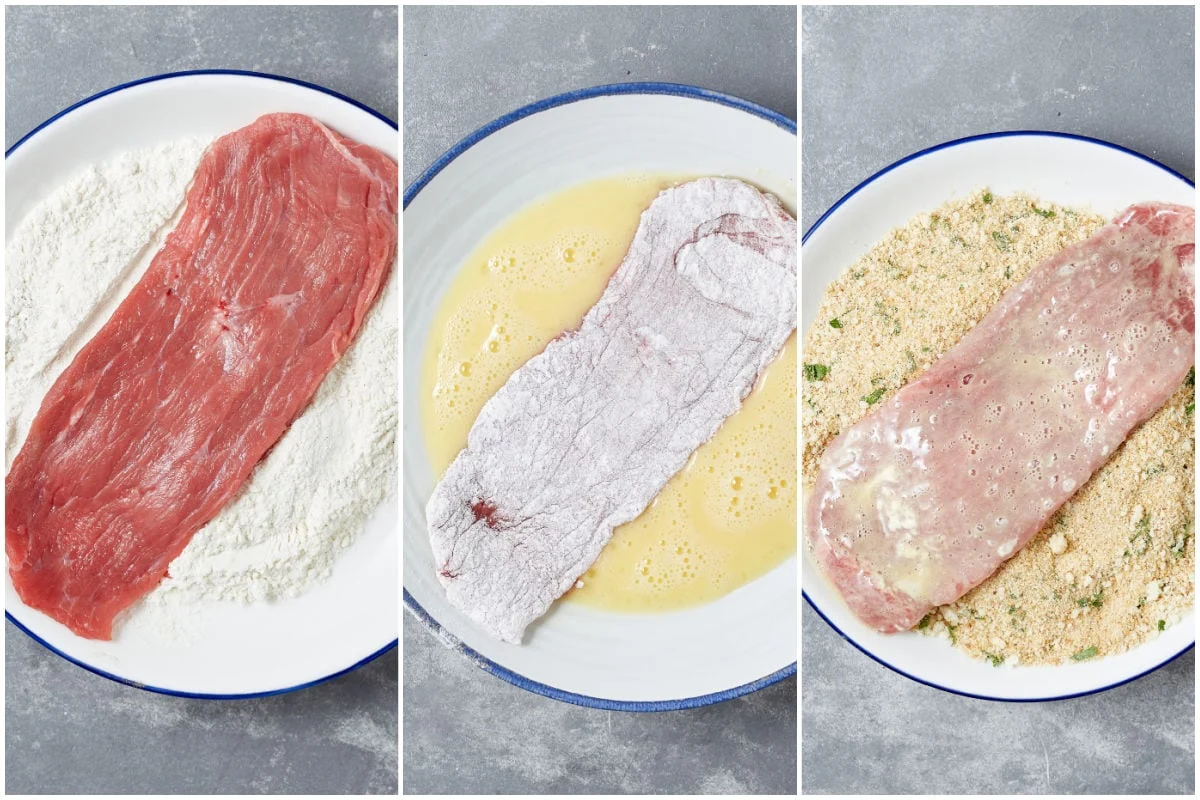
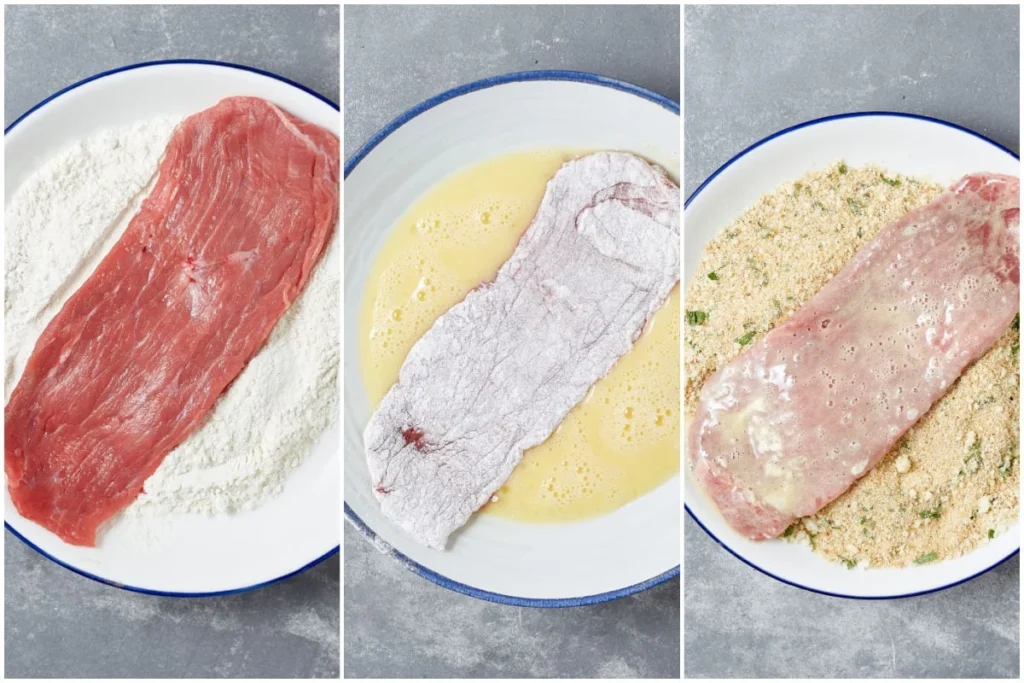
- Prepare Stations: Set up three bowls – one with flour, one with beaten eggs (mixed with a splash of milk or water), and one with seasoned bread crumbs.
- Dredge in Flour: Lightly coat each piece of meat in flour, shaking off excess. This initial coating helps the egg wash adhere better.
- Dip in Egg Wash: Submerge the floured meat into the egg wash, ensuring it’s fully coated. Let any excess drip off to prevent clumping.
- Coat with Bread Crumbs: Press the meat into the bread crumbs, covering all sides thoroughly. For an extra crispy coating, repeat the egg wash and bread crumb steps. Double breading is especially effective for chicken Milanesa.
Common Mistakes to Avoid
Even experienced cooks can make mistakes when preparing Milanesa. Here are some common pitfalls to watch out for:
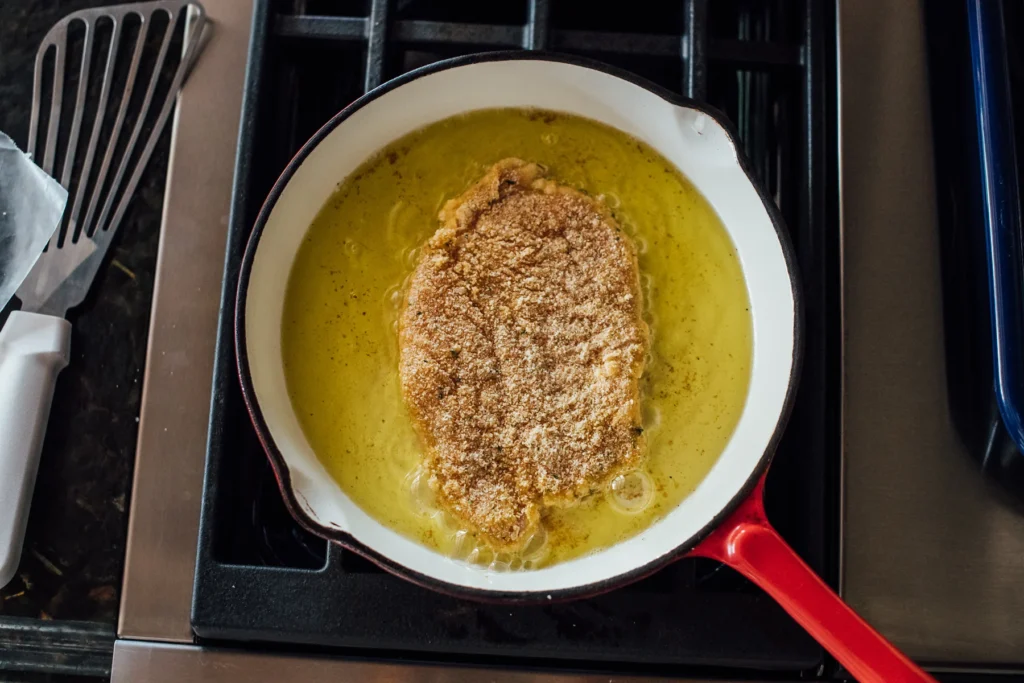
- Overcrowding the Pan: Cooking too many pieces at once lowers the oil temperature, leading to soggy Milanesa. Cook in batches for best results. Overcrowding also makes it difficult to turn the meat without disturbing the breading.
- Inadequate Oil Temperature: If the oil isn’t hot enough, the breading will absorb too much oil. Ensure the oil is at the right temperature (around 350°F or 175°C). A kitchen thermometer is a handy tool to maintain the correct frying temperature.
- Skipping the Resting Time: Let the breaded meat rest for a few minutes before frying. This helps the coating adhere better. Resting also allows the breading to dry out slightly, which helps it crisp up during frying.
- Thin or Thick Slices: Ensure the meat slices are uniformly thin. Too thick and they won’t cook through properly; too thin and they may dry out. Aim for a thickness of about 1/4 inch for optimal results.
Tips for Achieving the Perfect Crust
The key to a great Milanesa is a golden, crispy crust that doesn’t fall off during cooking. Here are some tips to help you achieve this:
- Double Breading: For an extra crunchy Milanesa, double dip the meat in the egg wash and bread crumbs. This method creates a thicker crust that holds up well to frying.
- Resting Time: After breading, let the meat rest on a wire rack for 15-20 minutes before frying. This allows the coating to set.
- Proper Oil Temperature: Use a thermometer to maintain a consistent oil temperature around 350°F (175°C). Too hot, and the breading will burn; too cool, and it will be greasy.
- Drain Properly: After frying, place the Milanesa on a wire rack over a baking sheet to drain excess oil, ensuring it stays crispy. Avoid placing it on paper towels, as this can cause the breading to become soggy from trapped steam.
- Use of Clarified Butter: For a richer flavor, some chefs use a combination of oil and clarified butter for frying. Clarified butter has a higher smoke point than regular butter, making it suitable for frying.
Advanced Techniques and Variations
For those looking to elevate their Milanesa game, consider these advanced techniques and variations:
- Stuffed Milanesa: Try stuffing the meat with ham and cheese before breading for a “Cordon Bleu” style Milanesa. Secure the edges with toothpicks to prevent the filling from leaking out during frying.
- Herb-Infused Bread Crumbs: Mix finely chopped fresh herbs like parsley, thyme, or rosemary into the bread crumbs for an aromatic twist.
- Nut Crust: Replace a portion of the bread crumbs with finely chopped nuts like almonds or pecans for added texture and flavor.
- Spicy Milanesa: Add a pinch of cayenne pepper or chili powder to the bread crumbs for a spicy kick.
FAQs
Disclosure: Our blog contains affiliate links to products. We may receive a commission for purchases made through these links. However, this does not impact our reviews and comparisons. We try our best to keep things fair and balanced, in order to help you make the best choice for you.

